
 Save
Save
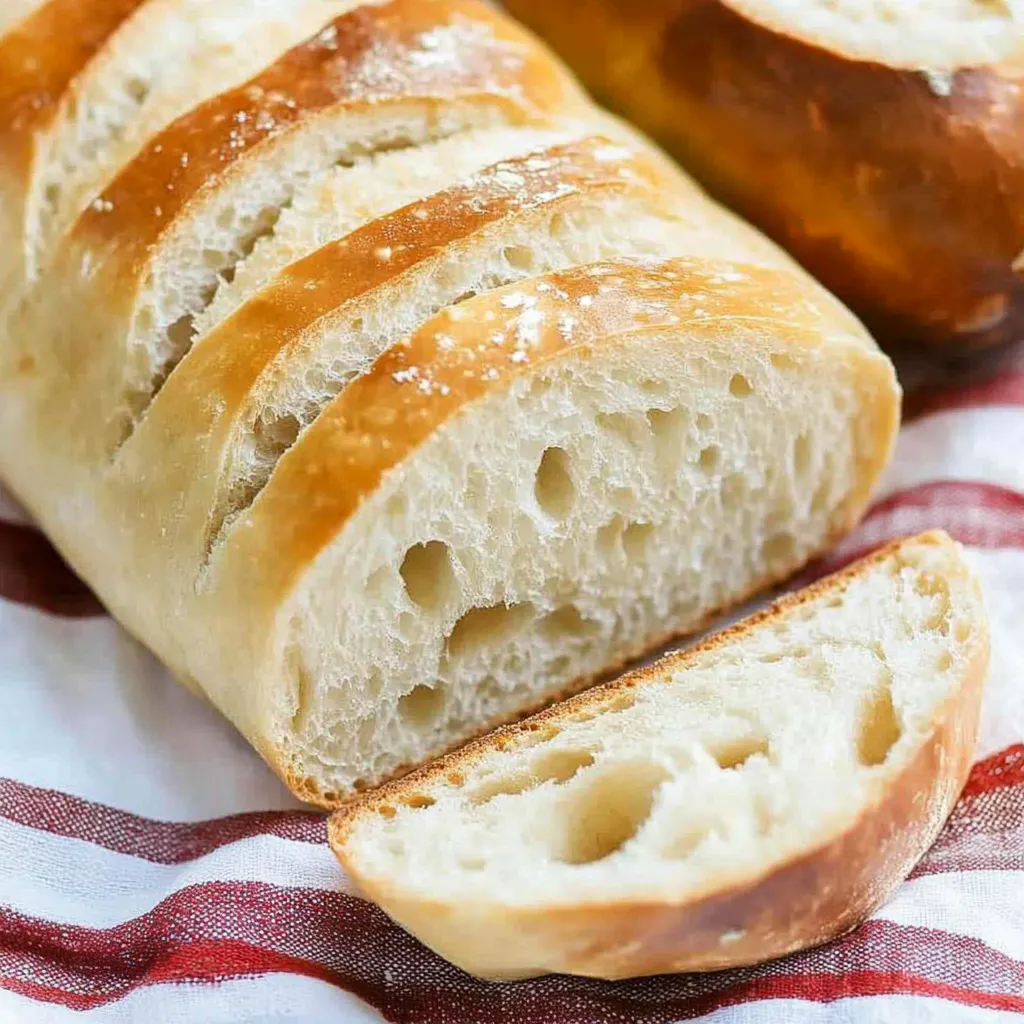
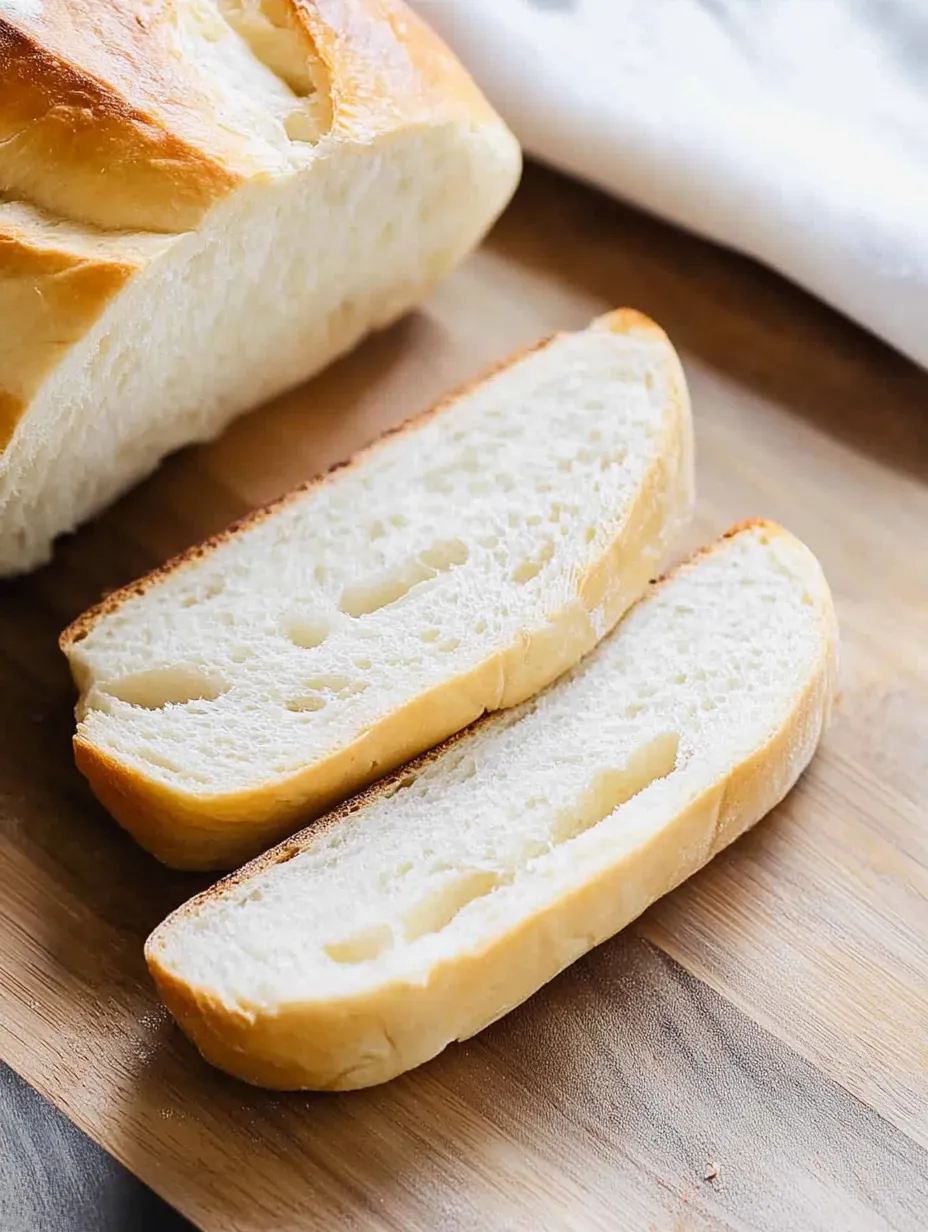
This homemade French bread recipe transforms simple ingredients into bakery-quality loaves with a golden, crispy exterior and a perfectly soft, chewy interior. The best part? It takes just 90 minutes from start to finish, making it accessible even on busy weeknights when you crave something special alongside dinner.
I developed this recipe after years of disappointing results with other methods. After countless adjustments, this version consistently delivers that authentic French bread texture my family requests whenever we have pasta night or homemade soup.
Ingredients
- Water at 105°F activates the yeast without killing it. Test on your wrist for the perfect baby-bottle warmth.
- Active dry yeast provides the rise. Always check expiration date for best results.
- Granulated sugar feeds the yeast and enhances browning. Its subtle sweetness balances the bread.
- All-purpose flour works beautifully, though bread flour gives an even chewier texture if you have it.
- Fine sea salt strengthens the gluten structure and enhances flavor. Never skip this crucial ingredient.
- Olive oil prevents sticking and adds a subtle richness to the finished bread.
- Melted salted butter for brushing creates an irresistible golden finish. Optional but recommended.
Step-by-Step Instructions
- Activate the yeast
- Combine the warm water, yeast, and sugar in a small bowl. Wait 5 minutes until it becomes foamy and fragrant. This ensures your yeast is alive and will give your bread a proper rise. The mixture should look creamy and smell pleasantly yeasty.
- Create the base dough
- Stir together 2 cups of flour with the salt in your stand mixer bowl or large mixing bowl. Pour in the foamy yeast mixture and mix until combined. The consistency will be quite wet at this stage, resembling a thick batter more than a dough.
- Develop the gluten
- Gradually add more flour in small increments, kneading between additions, until the dough becomes smooth and only slightly tacky. When pressed with a finger, it should spring back slightly. This typically requires about 5 cups total, but humidity levels can affect flour absorption.
- First rise
- Coat the dough ball with olive oil, cover the bowl with a clean kitchen towel, and let it rest for at least 15 minutes. The longer you can let it rise, up to an hour, the better your flavor development will be. Look for the dough to increase in size by about 25%.
- Shape the loaves
- Divide the dough in half on a well-floured surface. Roll each half into a 15-inch rectangle, then roll from the long side to form a cylinder. Turn the ends under and pinch all seams tightly to seal. The surface tension created helps achieve that classic French bread shape.
- Second rise
- Place shaped loaves on your prepared baking sheet. Make three diagonal slashes across the top using a sharp knife or razor to allow for expansion during baking. Cover with a towel and let rise 30-60 minutes until noticeably puffy. Longer rising creates better texture.
- Bake to perfection
- Bake in a preheated 400°F oven for 17-23 minutes. Look for a golden-brown crust and hollow sound when tapped. If browning too quickly, lower temperature to 375°F and cover lightly with foil. Brush warm loaves with melted butter for an extra-tender crust.
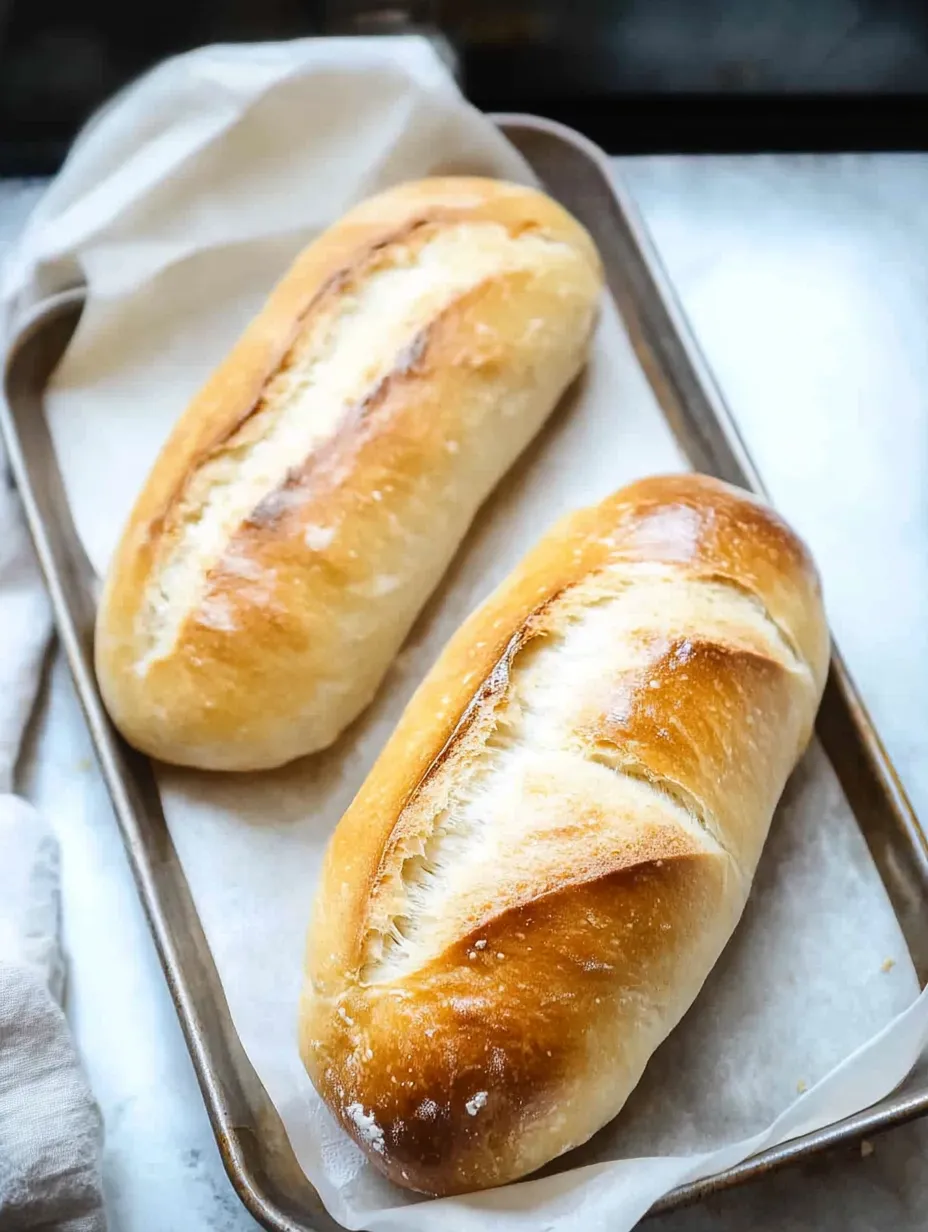
My absolute favorite part of this recipe is the moment those diagonal cuts expand in the oven, creating that distinctive French bread appearance. My children know dinner is almost ready when the house fills with that incredible fresh bread aroma. Even my pickiest eater devours these loaves!
Perfecting Your Crust
While I personally prefer the softer crust version in the main recipe, you can easily achieve that classic crackling French bread exterior. For the crispiest result, brush the shaped loaves with a mixture of one egg white whisked with a teaspoon of water just before baking. This creates a shiny, crackly finish. Additionally, place a small oven-safe dish with ice cubes on the bottom rack of your oven during preheating. The steam created mimics professional bakery ovens, developing that characteristic crust.
Troubleshooting Common Issues
If your bread isn't rising properly, your yeast might be old or your water temperature was off. Test yeast freshness by ensuring it foams vigorously during activation. Water that's too hot kills yeast, while too-cool water won't activate it properly. The ideal temperature feels warm but not hot on your wrist. During winter months, warm your mixing bowl with hot water before starting and let the dough rise in a slightly warm oven that's been turned off to combat chilly kitchen temperatures.
Storage And Serving Tips
For the authentic French bread experience, store loaves in a paper bag or wrapped in a clean kitchen towel at room temperature. This preserves the crust quality better than plastic bags, which trap moisture and soften the exterior. While best eaten the day it's made, you can refresh day-old bread by spritzing it lightly with water and warming in a 300°F oven for 5-7 minutes. This bread makes exceptional garlic bread, French toast, and bread pudding once it's a few days old. For freezing, wrap cooled whole loaves tightly in plastic wrap, then aluminum foil before freezing up to 3 months.
Recipe FAQs
- → How do I know when my French bread is fully baked?
Your French bread is done when the crust is golden brown and when you tap the bottom of the loaf, it sounds hollow. This typically takes 17-23 minutes at 400°F. If you notice the top browning too quickly, lightly cover with foil and lower the temperature to 375°F.
- → Can I make this French bread without a stand mixer?
Absolutely! While a stand mixer makes the process easier, you can mix the dough by hand in a large mixing bowl. Stir the ingredients together with a wooden spoon and then knead the dough on a floured surface until smooth and elastic.
- → How should I store leftover French bread?
For best results, store your French bread in a brown paper bag at room temperature. This helps maintain the texture of the crust better than plastic storage. For longer storage, you can freeze the cooled bread in a zip-top bag with all air removed for up to 3 months.
- → Why didn't my bread rise properly?
Several factors can affect rising: your yeast might be old or expired, the water might have been too hot (killing the yeast) or too cold (not activating it), or the environment might be too cool. Ensure your water is around 105°F, your yeast is fresh, and let the dough rise in a warm, draft-free location.
- → How can I make my French bread crust crispier?
For a crispier crust, brush the loaves with a mixture of 1 egg white whisked with a teaspoon of water before baking. Alternatively, add a few ice cubes to the oven when you put the bread in - the steam helps create that crispy exterior. You'll want to add a few extra minutes to the baking time when using these methods.
- → Can I add herbs or cheese to this French bread?
Yes! This base recipe works wonderfully with additions. For herb bread, mix in 1-2 tablespoons of dried herbs like rosemary, thyme, or Italian seasoning during the mixing stage. For cheese bread, fold in 1 cup of shredded cheese like Parmesan or Gruyère after the first rise, just before shaping the loaves.