
 Save
Save
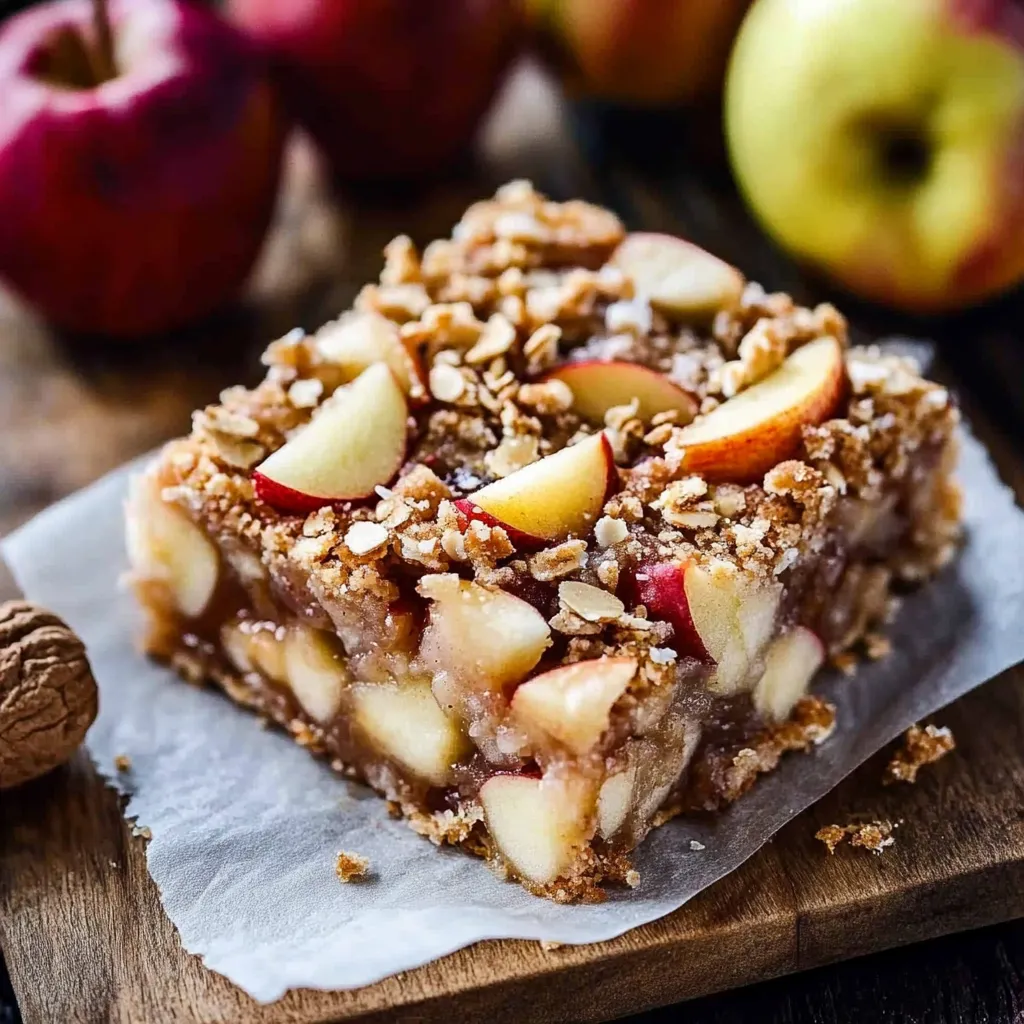
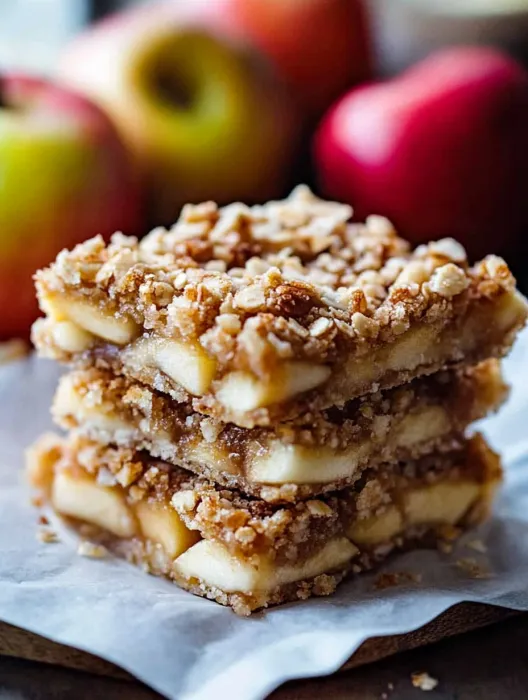
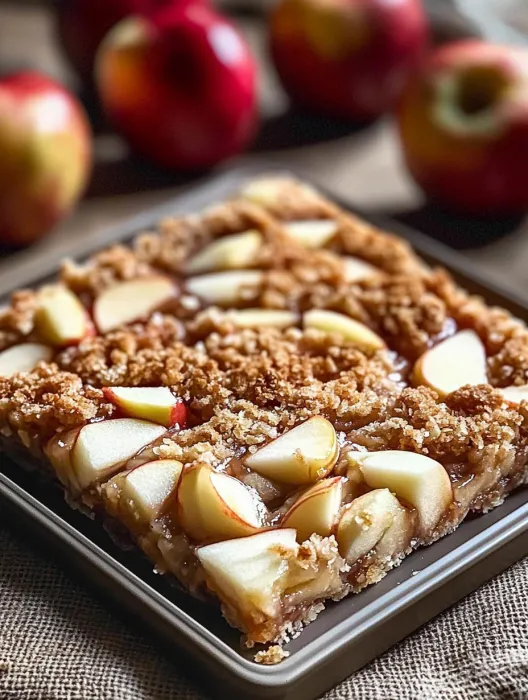
This apple harvest square recipe transforms ordinary apples into an extraordinary layered dessert with a buttery crust, tender spiced apples, and a coconut-walnut topping that caramelizes beautifully. After making these squares for countless fall gatherings, I can promise they disappear faster than the autumn leaves.
I first baked these squares for a neighborhood potluck when we moved into our home seven years ago. What began as a way to meet neighbors has become my signature dessert that friends request by name every apple season.
Ingredients
- All purpose flour provides the sturdy base for these squares without becoming heavy
- Granulated sugar divided throughout the recipe to perfectly sweeten each layer
- Unsalted butter cold and cubed ensures a perfectly crisp cookie like crust
- Fresh apples Honeycrisp or Granny Smith work beautifully for their balance of sweetness and structure
- Lemon juice brightens the apple flavor and prevents browning
- Ground cinnamon warms the entire dessert with classic apple pie flavor
- Egg binds the topping ingredients together for perfect texture
- Evaporated milk creates richness in the topping without excess moisture
- Vanilla extract adds depth to the sweet topping
- Chopped walnuts provide essential crunch and nutty flavor
- Flaked coconut caramelizes during baking for texture and subtle tropical notes
Step-by-Step Instructions
- Prepare the Base
- Process the flour, portion of sugar, and salt with cold butter pieces until you achieve fine crumbs. The mixture will appear very dry but transforms magically during baking. Press firmly into your prepared pan to create an even layer that will support the apples.
- Prepare the Apple Layer
- Toss fresh apple slices with lemon juice to prevent browning and add brightness. Arrange them in neat rows over the crumb base for even baking and professional presentation. The cinnamon sugar sprinkled over creates pockets of spiced sweetness throughout.
- First Baking Stage
- Bake for exactly 20 minutes to partially set the crust and begin softening the apples. This step ensures the base becomes crisp rather than soggy from the apple juices releasing during baking.
- Create the Topping
- Mix the remaining sugar with egg, evaporated milk, vanilla, walnuts and coconut until thoroughly combined. The mixture will seem loose but transforms into a golden caramelized topping as it bakes. Spread it carefully over the hot partially baked layers.
- Final Baking
- Return to the oven for the remaining time until the topping turns a beautiful golden brown with caramelized edges. The aroma filling your kitchen will signal when perfection is near.
- Cooling and Cutting
- Score into squares while still warm for clean edges, but allow to cool completely before serving for the flavors to fully develop and the layers to set properly.
The evaporated milk in this recipe is my secret weapon. My grandmother always used it in her apple desserts instead of regular milk, creating a richness that reminds me of fall afternoons in her kitchen. The subtle caramel notes it adds to the topping make these squares truly special.
The Perfect Apple Selection
The beauty of this recipe lies in its versatility with apple varieties. Firm apples like Honeycrisp, Braeburn or Granny Smith maintain their structure during baking while providing different flavor profiles. Mix two varieties for complexity. Slice them uniformly about 1/4 inch thick to ensure even cooking. Remember that some apples release more juice than others, so adjust expectations accordingly.
Make Ahead Tips
These squares actually improve with time as the flavors meld together. Make them up to two days before serving and store covered at room temperature. For longer storage, refrigerate for up to five days. Bring to room temperature before serving or warm slightly in a 300°F oven for 10 minutes to revive the crisp texture.
Seasonal Adaptations
While perfect for fall apple season, this recipe adapts beautifully throughout the year. Replace apples with fresh peaches in summer, pears in winter, or a mix of berries in spring. Adjust spices accordingly, perhaps cinnamon and ginger for pears or cardamom with peaches. The base recipe remains your trusty template for showcasing seasonal fruit treasures.
Recipe FAQs
- → What kind of apples work best for Apple Harvest Squares?
Firm, tart apples like Granny Smith, Honeycrisp, or Braeburn work exceptionally well as they hold their shape during baking and provide a nice contrast to the sweet topping. Avoid softer varieties like McIntosh that might break down too much during baking.
- → Can I make Apple Harvest Squares in advance?
Yes! These squares can be made 1-2 days ahead and stored in an airtight container at room temperature. For longer storage, refrigerate for up to 5 days. The flavor actually improves slightly after the first day as the components meld together.
- → Is there a substitute for the coconut in the topping?
If you're not a fan of coconut, you can substitute with quick oats for texture, or simply increase the amount of chopped walnuts. You could also try adding some dried cranberries for a different but complementary flavor profile.
- → Why do I need to cut the squares while they're still warm?
Cutting while still warm makes it easier to get clean cuts through the layers, especially through the apple layer. As the squares cool completely, the topping sets firmly, which could make cutting more difficult and potentially cause the layers to separate.
- → Can I freeze Apple Harvest Squares?
Yes, these squares freeze beautifully! After cooling completely, wrap individual portions in plastic wrap, then store in a freezer-safe container for up to 3 months. Thaw overnight in the refrigerator or for a few hours at room temperature before serving.
- → How do I know when the Apple Harvest Squares are fully baked?
The topping should be lightly golden brown, and if you insert a toothpick near the center, it should come out clean without wet batter. The apples should also be tender when pierced with a knife.