
 Save
Save
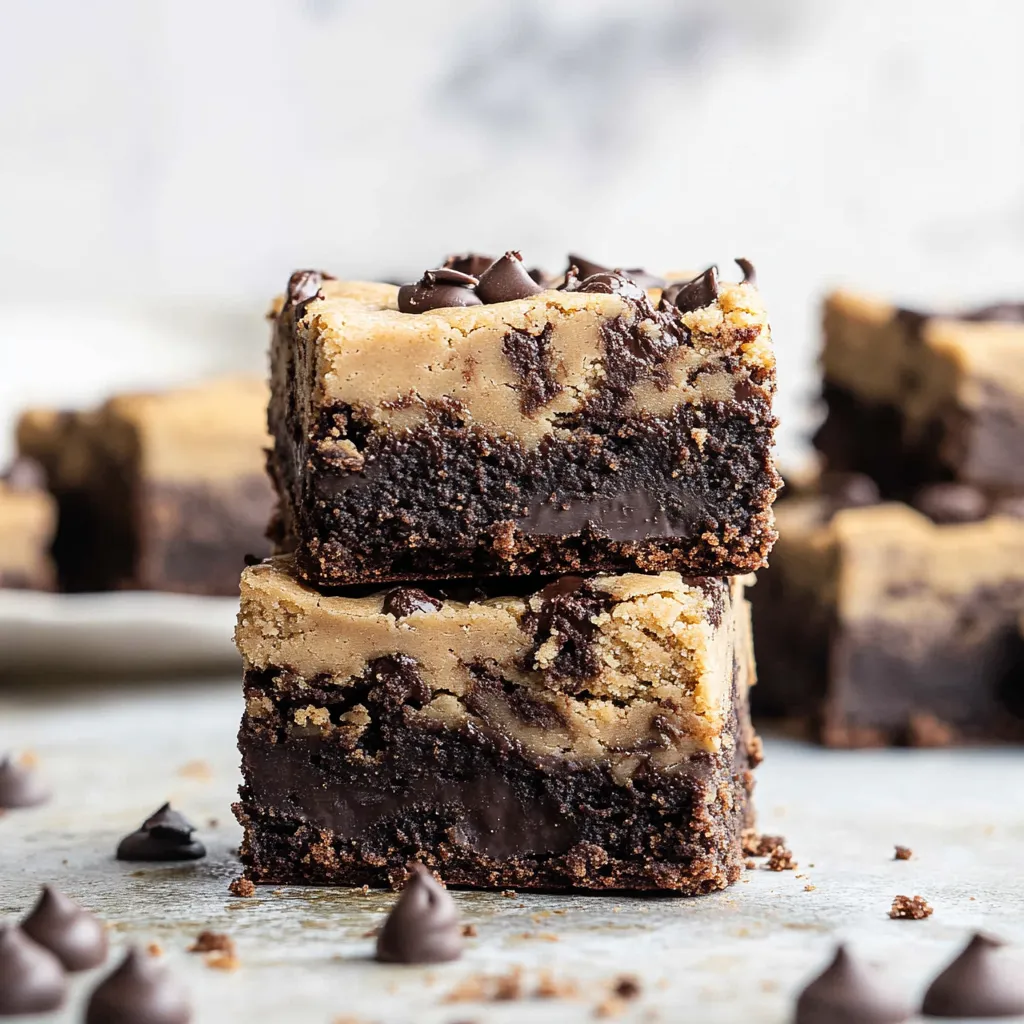
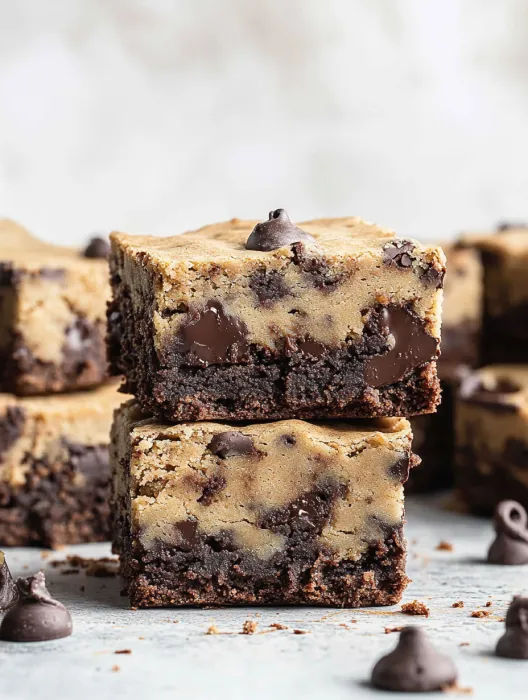
This decadent cookie dough brownie recipe combines two beloved treats into one irresistible dessert. The fudgy brownie base provides the perfect foundation for a creamy layer of cookie dough, finished with a drizzle of melted chocolate that ties everything together beautifully.
I first created these brownies for my nephew's birthday party, and they disappeared faster than any other dessert on the table. Now they've become my signature contribution to family gatherings, with everyone requesting them by name.
Ingredients
- For the Brownies: Large eggs at room temperature ensure proper incorporation and structure
- Dutch processed cocoa powder creates that deep, rich chocolate flavor
- Salt enhances all the flavors and balances sweetness
- Baking powder provides just enough lift without making them cakey
- Vanilla extract adds warmth and complexity
- Unsalted butter gives you better control over salt content
- Granulated sugar for sweetness and moisture
- All purpose flour for structure without toughness
- Chocolate chips create melty pockets of chocolate throughout
- For the Cookie Dough: Melted unsalted butter creates a rich, dense texture
- Brown sugar adds moisture and caramel notes
- Granulated sugar for sweetness and proper texture
- Heavy cream makes the dough extra creamy and smooth
- Vanilla extract rounds out the classic cookie flavor
- Salt balances the sweetness perfectly
- Heat treated flour ensures food safety since the dough remains unbaked
- Miniature chocolate chips distribute better throughout the dough
- For the Chocolate Drizzle: Chocolate chips melted properly create a smooth, glossy finish
Step-by-Step Instructions
- Prepare Your Pan
- Line a 9x13 inch baking pan with aluminum foil, leaving overhang for easy removal. This step is crucial for clean cutting later and prevents sticking entirely. Press the foil into corners and smooth against sides.
- Mix Brownie Base
- Thoroughly whisk eggs, cocoa powder, salt, baking powder and vanilla for a full 5 minutes. This develops structure and incorporates air for the perfect texture. The mixture will look thick and almost paste like.
- Create Butter Sugar Mixture
- Melt butter completely in microwave, then whisk in sugar for 3 to 4 minutes until the mixture becomes glossy. This extended mixing dissolves sugar crystals and creates a better final texture.
- Combine And Bake
- Carefully fold the butter mixture into the cocoa mixture, stirring until completely incorporated. Add flour and chocolate chips just until no dry spots remain. Spread evenly in prepared pan and bake for exactly 30 minutes at 350°F until a tester shows moist crumbs.
- Prepare Cookie Dough
- While brownies cool, beat melted butter with both sugars until the mixture lightens in color and becomes smooth. Add heavy cream, vanilla and salt, mixing thoroughly. Carefully fold in heat treated flour just until incorporated, then stir in mini chocolate chips.
- Assemble The Layers
- After chilling the brownies and cookie dough separately, spread the cookie dough evenly over the brownie layer. Use greased hands or wax paper to press it into an even layer without tearing the brownies beneath.
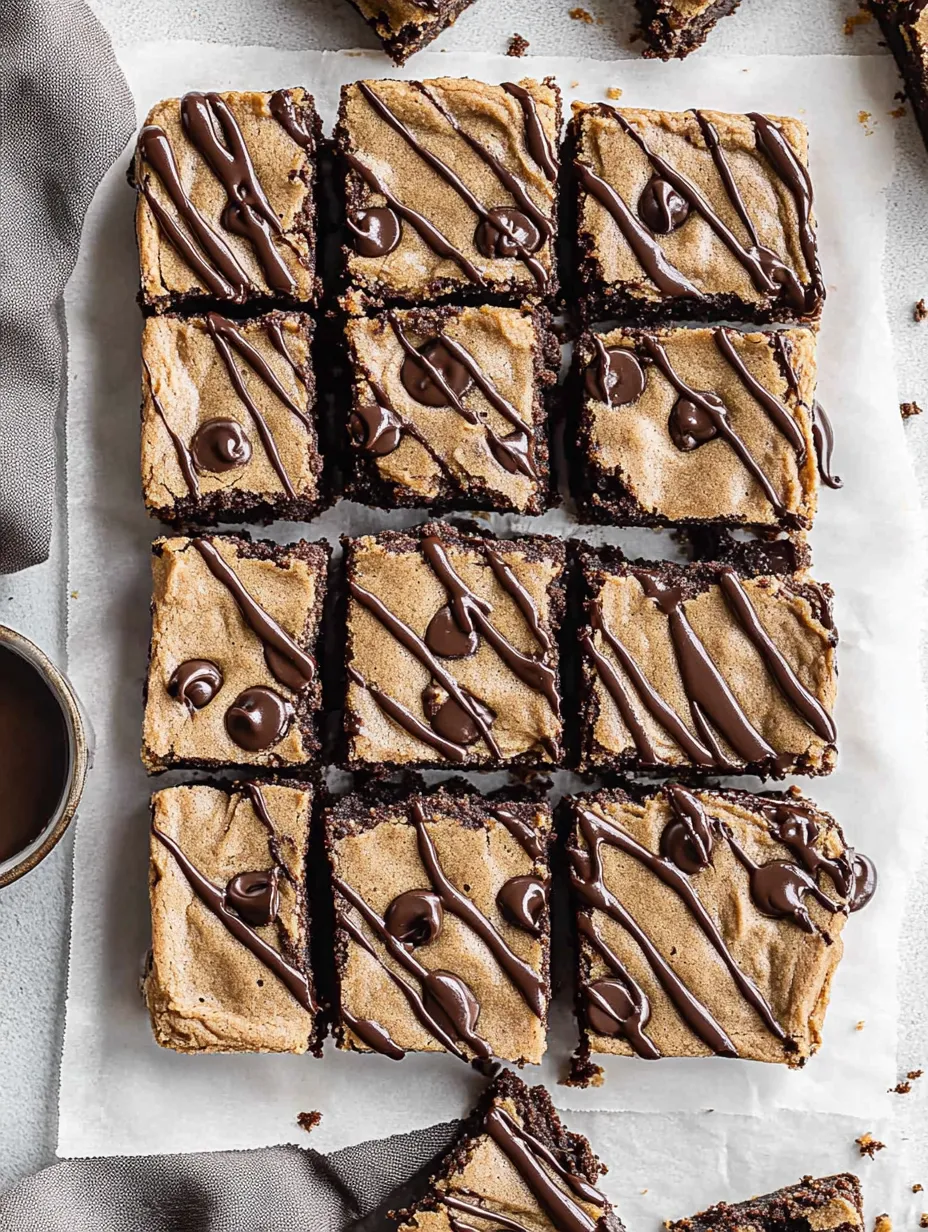
- Finish And Garnish
- After chilling the assembled bars, use a sharp knife to cut into squares, cleaning the blade between cuts for professional looking edges. Drizzle with melted chocolate in a decorative pattern for visual appeal and extra chocolate flavor.
My favorite part about these brownies is the textural contrast between the fudgy brownie and the creamy cookie dough. The first time I served them at a family gathering, my brother in law ate four pieces before anyone else had seconds. Now I always make a double batch when he visits.
Storage Solutions
These cookie dough brownies maintain their quality impressively well when stored properly. Keep them in an airtight container in the refrigerator for up to 5 days for the best texture and flavor. The chilled temperature actually enhances the contrast between the fudgy brownie and creamy cookie dough layers. For longer storage, wrap individual portions in plastic wrap and place in a freezer bag for up to 3 months. Thaw in the refrigerator overnight before serving.
Clever Substitutions
While the classic chocolate cookie dough is magnificent, this recipe welcomes creative variations. Try white chocolate chips in the cookie dough for a striking visual contrast. Peanut butter chips create an incredible flavor combination that tastes like a gourmet peanut butter cup. For mint lovers, add 1/4 teaspoon of mint extract to the cookie dough and use mint chocolate chips for a refreshing twist. The brownie base works wonderfully with any of these variations.
Serving Suggestions
These brownies shine as a standalone dessert but can be elevated for special occasions. For an ultimate dessert experience, serve slightly warmed with a scoop of vanilla ice cream and extra chocolate sauce. Cut into smaller portions for an elegant addition to dessert platters at parties. For gifting, package individual squares in small bakery boxes tied with ribbon for a thoughtful homemade present that will be truly appreciated.
Recipe FAQs
- → Why do I need to use heat-treated flour for the cookie dough?
Heat-treated flour is essential for food safety since the cookie dough layer remains unbaked. Raw flour can contain harmful bacteria like E. coli. By heating the flour to 160°F, either by baking it in a 350°F oven or microwaving until it reaches the proper temperature, you eliminate potential pathogens while maintaining the raw cookie dough texture and flavor.
- → Can I make these brownies ahead of time?
Absolutely! These brownies actually benefit from being made ahead. The layers set more firmly and the flavors meld together beautifully. You can store them in an airtight container in the refrigerator for up to 5 days. For longer storage, freeze them for up to 3 months and thaw in the refrigerator before serving.
- → What variations can I make to this dessert?
There are several delicious variations you can try. Substitute peanut butter chips for chocolate chips in the brownie layer for a peanut butter cookie dough brownie. You could also add mint extract to the cookie dough layer for mint chocolate chip brownies, or incorporate crushed Oreos into either layer for a cookies and cream version.
- → Why do I need to chill the brownies between layers?
Chilling the brownies after baking helps them set properly and makes spreading the cookie dough layer much easier. The firmer texture prevents the brownie from crumbling or mixing with the soft cookie dough. Similarly, chilling the cookie dough before spreading helps achieve a cleaner, more even layer that won't be too sticky to work with.
- → How do I get clean cuts when slicing these brownies?
For clean, professional-looking cuts, use a sharp knife and wipe it clean between each slice. Chilling the brownies thoroughly before cutting also helps maintain sharp edges. For extra precision, you can dip your knife in hot water, dry it quickly, then make your cut—the warm blade will slice through more smoothly.
- → Is there a way to make this dessert less sweet?
To reduce sweetness, you can decrease the sugar in both layers by up to 25% without significantly affecting the texture. Using dark chocolate (60% cacao or higher) for the drizzle and chips will also balance the sweetness with more complex chocolate flavor. Additionally, adding a pinch of espresso powder to the brownie layer enhances the chocolate flavor while cutting through some of the sweetness.