
 Save
Save
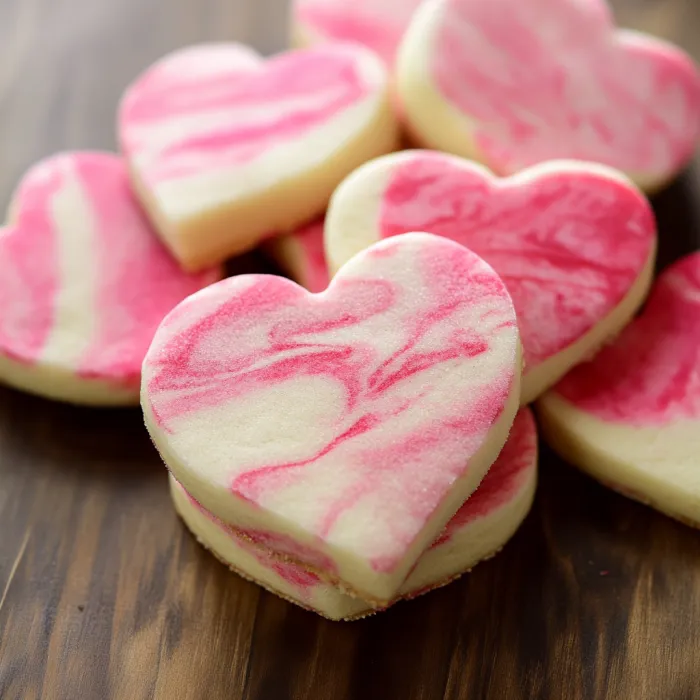
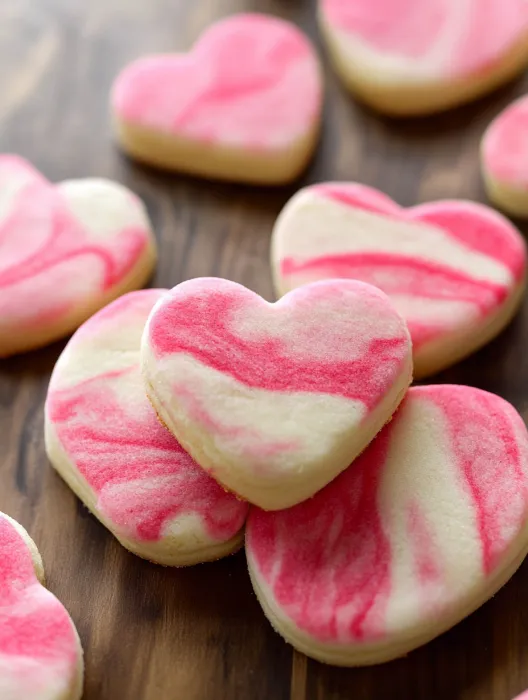
This marbled Valentine sugar cookie recipe transforms ordinary sugar cookies into a festive treat that's perfect for showing your love through baking. The beautiful pink and white swirls create an eye-catching effect that makes these cookies as beautiful as they are delicious.
I first made these cookies for my daughter's classroom Valentine's party and they were such a hit that they've become our annual tradition. The marbling technique never fails to impress guests who think they're much more complicated than they actually are.
Ingredients
- Unsalted butter provides a rich, clean flavor base that lets the vanilla shine through
- Granulated sugar gives these cookies their perfect crisp-tender texture
- Large egg binds everything together while adding richness
- Vanilla extract adds that classic warm sugar cookie flavor
- Salt balances the sweetness and enhances all other flavors
- Baking powder provides just enough lift without making them cakey
- All purpose flour creates the perfect sturdy but tender cookie structure
- Gel food coloring creates vibrant colors that won't fade during baking
Step-by-Step Instructions
- Create the Base Dough
- Beat butter and sugar until light and fluffy using a stand mixer or hand mixer. This usually takes about 3-4 minutes and is crucial for incorporating air into the dough. Add egg and vanilla, then mix in salt and baking powder. Gradually add flour until fully combined with no dry streaks remaining.
- Divide and Color
- Split the dough into two equal portions. Leave one portion plain white. Add dark pink gel coloring to the second portion, mixing thoroughly until the color is completely uniform. Gel coloring is essential here as liquid food coloring would change the dough consistency.
- Marble the Dough
- Pinch off golf ball sized pieces from both doughs and arrange them in an alternating pattern. Gently knead the pieces together just enough to create beautiful swirls without fully blending the colors. The key is to stop when you see distinct swirls forming to maintain the marbled effect.
- Chill the Dough
- Form the marbled dough into a disc shape, wrap it tightly in plastic wrap, and refrigerate for 30-60 minutes. This chilling step is non-negotiable as it prevents spreading during baking and helps the cut shapes hold their definition.
- Roll and Cut
- On a lightly floured surface, roll the chilled dough to 1/4-inch thickness. Use heart-shaped cutters or any festive shapes you prefer. Transfer cut cookies to a prepared baking sheet, leaving about 2 inches between each cookie.
- Freeze Before Baking
- Place the sheet of cut cookies in the freezer for 15 minutes. This extra chilling step is my secret to cookies that maintain their sharp edges during baking. Meanwhile, gather scraps, re-roll, and continue cutting until all dough is used.
- Bake to Perfection
- Bake at 350°F for exactly 12 minutes. The cookies should be set but not browned at the edges. Let them rest on the hot baking sheet for 2 minutes to firm up slightly before transferring to a cooling rack.
Vanilla is truly the star ingredient in these cookies. I splurge on high-quality pure vanilla extract for these because the flavor really shines through in such a simple cookie. My grandmother taught me that the quality of vanilla can make or break a sugar cookie recipe.
Make-Ahead Magic
The dough for these marbled cookies can be prepared up to 3 days in advance and kept refrigerated. Just be sure to wrap it tightly in plastic wrap. When ready to bake, let the dough sit at room temperature for about 10-15 minutes before rolling for easier handling. You can also freeze the cut-out cookie shapes on baking sheets, then transfer to freezer bags for up to a month. Bake directly from frozen, just adding 1-2 minutes to the baking time.
Creative Color Variations
While pink and white are perfect for Valentine's Day, this marbling technique works beautifully with any color combination. Try red and green for Christmas, orange and black for Halloween, or school colors for graduation celebrations. For an ombre effect, divide the dough into three portions and color each with varying intensities of the same color. The marbling technique remains the same regardless of your color choices.
Decorating Options
These cookies are beautiful on their own, but you can take them to the next level with simple decorations. A light dusting of sanding sugar before baking adds subtle sparkle. After cooling, try drizzling with a simple glaze made from powdered sugar and milk, or outline the hearts with royal icing. For a more rustic look, dip half the cookie in melted chocolate and sprinkle with festive nonpareils.

Recipe FAQs
- → How do I achieve the perfect marble effect without overmixing?
For the best marble effect, alternate balls of pink and white dough in a pattern, then gently fold and press them together just a few times. Stop as soon as you see distinct swirls forming - overmixing will blend the colors completely. A light hand is key to maintaining visible color distinction.
- → Why do the cookies need to be frozen before baking?
Freezing the cut cookies for 15 minutes before baking helps them maintain their shape during baking. This prevents spreading and ensures your heart shapes stay crisp and defined, especially important for decorated cookies where the presentation matters.
- → Can I use different colors for the marbling effect?
Absolutely! While pink is traditional for Valentine's Day, you can customize the colors to match any holiday or occasion. Red and green work well for Christmas, pastels for Easter, or school colors for graduation celebrations. Just make sure to use gel food coloring for the most vibrant results without affecting dough consistency.
- → How thick should I roll the dough for the best cookies?
Roll the dough to exactly 1/4-inch thickness for the ideal cookie. Thinner cookies will become crispier and potentially burn easily, while thicker cookies might remain undercooked in the center. Using wooden dowel guides or specialized rolling pin rings can help maintain consistent thickness.
- → Can these cookies be made ahead and frozen?
Yes, these cookies freeze beautifully! You can freeze the unbaked cut-out cookies for up to 3 months - simply freeze them solid on a baking sheet, then transfer to a freezer container. Bake directly from frozen, adding 1-2 minutes to the baking time. Alternatively, freeze baked cookies in airtight containers with parchment between layers for up to 2 months.
- → What's the best way to store these cookies to maintain freshness?
Store completely cooled cookies in an airtight container at room temperature with parchment paper between layers to prevent sticking. Adding a piece of bread to the container can help maintain moisture. For maximum freshness, consume within a week, though the flavor is best within the first 3-4 days.