
 Save
Save
These gorditas de nata are my secret weapon for impressing weekend guests with authentic Mexican flavors without spending all day in the kitchen. Their pillowy texture and subtle sweetness transport me straight to the bustling markets of central Mexico where I first tasted them from a smiling vendor who insisted they were the best in town.
I discovered gorditas de nata during a culinary tour through Mexico's highlands and became obsessed with recreating that perfect balance of pillowy texture and subtle sweetness. After many experiments in my kitchen, this version consistently delivers that authentic bakery experience.
Ingredients
- All purpose flour creates the perfect structure while keeping them tender
- Heavy cream transforms into the magical nata when overwhipped delivering richness and moisture
- Dry yeast gives the slight rise that distinguishes gorditas from other flatbreads
- Vanilla sugar infuses a delicate aroma throughout each bite
- Butter enriches the dough and creates those beautiful golden spots when cooked
Step-by-Step Instructions
- Prepare the starter
- Combine warm milk, sugar, flour and yeast in a small bowl and stir thoroughly. Allow this mixture to rest for 15 minutes until it becomes slightly bubbly and active. This starter creates the foundation for the gorditas light texture.
- Create the cream mixture
- Whip heavy cream at high speed until it completely separates into butter and whey. This overwhipping is intentional and creates the authentic nata effect. Add egg, sugar, melted butter, salt and vanilla sugar, then combine everything with a spatula until smooth and uniform.
- Form the dough
- Sift flour into a separate bowl before adding the cream mixture and starter. Mix everything into a soft cohesive dough either by hand or with a mixer. The dough should remain soft and somewhat tacky but not overly sticky. Knead for about 5 minutes until smooth and elastic.
- First rise
- Shape the dough into a ball and place it in a bowl covered with plastic wrap. Allow it to rest in a warm place for 1.5 to 2 hours until doubled in size. This slow fermentation develops both flavor and texture.
- Shape the gorditas
- Roll the dough to a thickness of 7 mm approximately ¼ inch and cut into circles about 7 to 8 cm in diameter. Place these rounds on a lightly floured surface and cover with plastic wrap for their second rise of 30 minutes.
- Cook with patience
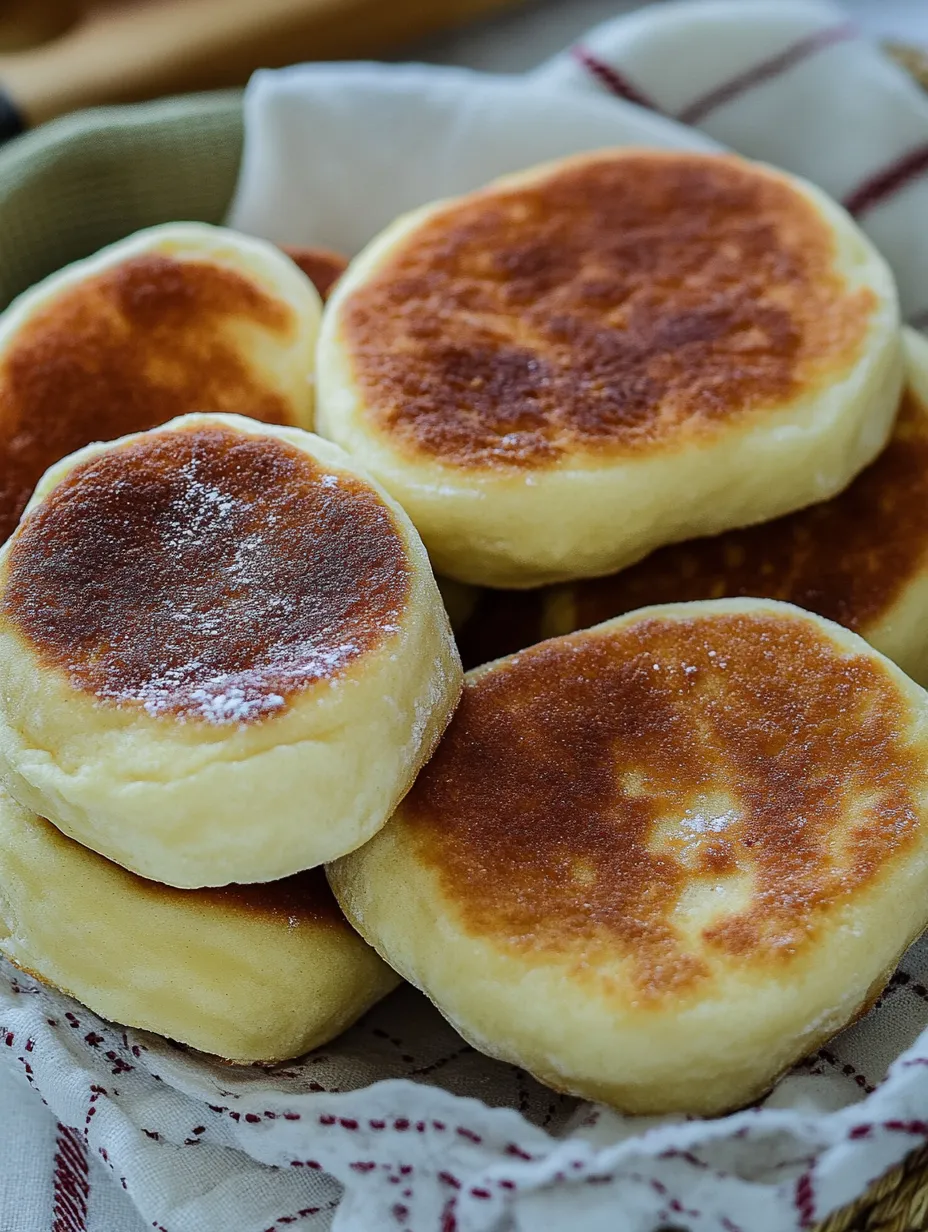
- Heat an ungreased pan over medium heat then reduce to low before adding the gorditas. Cook them slowly for 4 to 5 minutes per side flipping twice for a total cooking time of 15 to 20 minutes. The gradual cooking ensures they cook through without burning.
The magic of gorditas de nata lies in the transformation of heavy cream into that signature cultured cream flavor. I learned this technique from an elderly woman in Guadalajara who explained that overwhipping the cream mimics the natural fermentation that happens in traditional nata. Her family had been making gorditas this way for generations.
The Secret to Perfect Texture
The double rise process might seem fussy but it creates the signature airy interior gorditas are known for. When I first attempted this recipe I rushed the process and ended up with dense hockey pucks instead of the fluffy gorditas I was aiming for. The initial rise develops flavor while the second rise after shaping ensures the perfect texture. Watch carefully during cooking as the low temperature prevents burning while allowing the center to cook through completely.
Serving Traditions
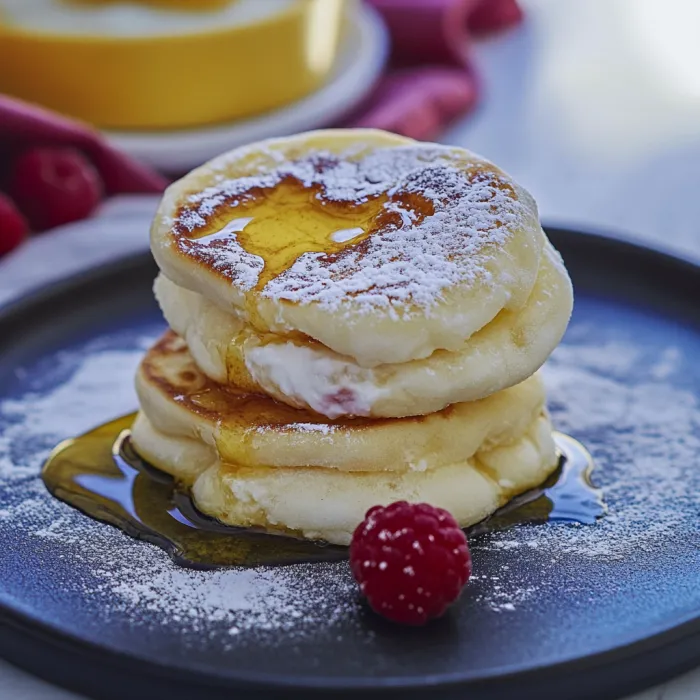
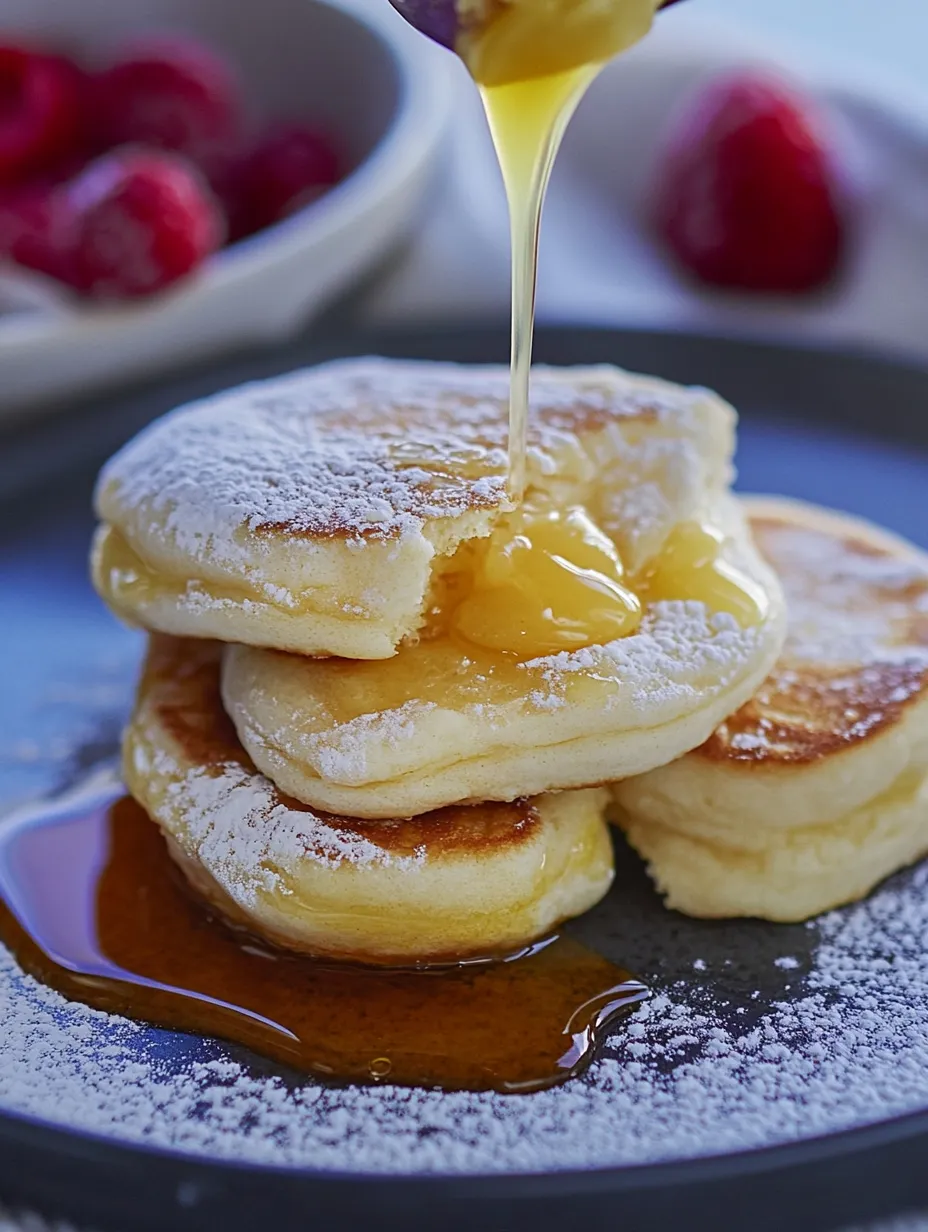
In Mexico gorditas de nata are often enjoyed with a dusting of powdered sugar or a drizzle of honey for breakfast alongside a steaming cup of café de olla. For a more substantial meal try splitting them and filling with savory ingredients like beans, cheese or shredded meat. My family particularly loves them warm from the pan with a spread of cajeta caramel and fresh berries. The contrast between the warm bread and cold fruit creates a delightful temperature contrast.
Storage and Reheating
These gorditas maintain their quality remarkably well when stored properly. Keep them in an airtight container at room temperature for up to 2 days. For longer storage freeze them in a single layer then transfer to a freezer bag once solid. When ready to enjoy reheat frozen gorditas in a dry skillet over low heat for about 5 minutes per side. Avoid microwaving as this tends to make them tough and chewy. A quick pass through a toaster oven also works beautifully to restore their fresh baked texture.
Recipe FAQs
- → What is nata and can I substitute it?
Nata is a type of clotted cream common in Mexican cooking. If unavailable, you can substitute with heavy cream (30% fat) as indicated in the recipe. The key is to overwhip it until it separates into butter and whey, which creates the characteristic rich texture of authentic gorditas de nata.
- → Why is my gordita dough too sticky?
Sticky dough usually means it needs more flour. Add flour gradually, just a tablespoon at a time, until the dough becomes manageable. However, be careful not to add too much—the dough should remain soft and airy, not stiff, to achieve the proper texture after cooking.
- → How do I know when gorditas are fully cooked?
Properly cooked gorditas should spring back when gently pressed on the side. If pressing leaves a flat indentation and feels soft inside, they need more cooking time. Continue cooking on low heat (never high, which burns the exterior while leaving the inside raw) until fully set, approximately 15-20 minutes total.
- → Can I make gorditas de nata ahead of time?
Yes, you can prepare the dough ahead of time and refrigerate it after the first rise. When ready to cook, allow the dough to come to room temperature before rolling and cutting. Cooked gorditas can be stored in an airtight container for 2-3 days and reheated briefly in a dry pan to restore their texture.
- → What's the best way to serve gorditas de nata?
Gorditas de nata are traditionally enjoyed warm, often dusted with powdered sugar or drizzled with honey. They pair wonderfully with coffee or hot chocolate for breakfast or as an afternoon snack. Some regions in Mexico serve them with a dollop of cajeta (goat's milk caramel) or jam on the side.
- → Why do my gorditas burn on the outside but stay raw inside?
This happens when the cooking temperature is too high. Gorditas require low, slow cooking (level 2 out of 9 on most stovetops) to ensure they cook through evenly without burning. Using a heavy-bottomed pan helps distribute heat more evenly and prevents hot spots that can cause burning.